Thursday, 22 October 2009

Summary


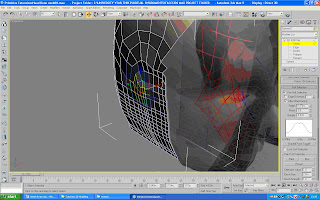
Having only five weeks to create my whole face seemed like a very short amount of time to do anything, and it has been hard to try and fit all the sections to the tutorial in and give each its allocated time, of course some areas like the modelling itself; creating the mesh for the face, following the topology for both head sections and modelling the head all took a lot longer then was first thought. I would have liked to get the whole lot completed and with a little bit more time I will, the areas that I missed out on are the bump and specular texture painting and modelling the ear. I did try to model the ear but this area confused me to the point of giving up and continuing with the other areas that needed to be created as I was just wasting time and not getting anywhere.

The problems that I have noted during this long and arduous task were mainly caused by the topology and the mesh’s not lining up correctly and me rushing this process, had a more relaxed approach been taken then I am sure these mistakes would have been missed out. I was too far ahead to start the process again and have had to just try to overcome these problems by adding more and more quads; thus increasing the technical process more and more and making the whole task more and more complex.

The most annoying part of this assignment is that I was constantly rewinding the videos back and forth trying to mimic the tutor and areas he did not explain left me screaming at the monitor screen asking for an explanation and getting none. Of course looking at the other students work and asking them questions did help me to some degree, but not all the time.

I have learnt a lot about the process of making a face in 3ds max, and all in only a short amount of time! I have had quite a steep learning curve in Photoshop too, as I did not really know how to navigate the software and what most of the tools did, again the tutor in the videos was a good help he actually did say most of the time what he was doing and why. I have learnt how to map the face, create 2d objects in max then make them into 3d ones, edit a UVW map and plot texture coordinates; this area always had me wondering how that is done, and now I know and in my spare time I will finish the tutorial and learn how the bump mapping process and specular texturing is done too and hopefully finish that ear that was giving me all them problems.

Over all I have thoroughly enjoyed this assignment, it has taught me new skills I can use from now on, and a technique for modelling faces that I never had. It has made me more artistic in the way I do things; I am becoming more patient and not rushing and have taught me that mistakes in the topology can really be seen well into the modelling process. All these skills will definitely be working with me as I carry on this module and proceed with the next task at hand.

Week five

Ok to start this part off I am in Photoshop, I have loaded my render map into Photoshop and have created a new layer on top of my background image and named it guide and have selected a nice blue colour, now I choose edit and fill and choose fore ground colour and click ok.
For the next part I need to have my white lines opaque and the black all transparent and that’s why I will use a layer mask to do this. So I switch back to the background ctrl a to select all then ctrl c to copy then go back to the blue layer and go into quick mask mode and paste the image over the top.
Now I need to be able to see what I am doing and the current mode does not allow me to see anything so Ive got to go to edit modify and borders and increase the pixels size to 4 this lets me see a lot more then I could already see.
Now I add the layer mask by clicking the button in the layer panel and it preserves what I have selected. Because I had the lines selected it removed all but those lines.
Now to finalise the layer so I right click on the guides mask and click apply. If I need to add a layer I am to make sure I have the new layer under the mask.
Next thing to do is open up the reference plates, resize the render map to 25% of what it was, then using the lasso tool I select the forehead in my reference image and paste it into the render map image and the scale it down using the transform tool.
Now we continue to do whole face this way. When you have multiple new layers and it gets all a bit confusing to select them there’s a handy tool on the move tool option which Is auto select this selects the layer underneath the mouse, also I have collapsed the layers I am happy with into one layer.
Just by using the patch tool I can stop my image from looking like many layers overlapping each other, I can select the patch tool and then draw around the seam in question and then drag the box over to a perfectly textured part of my face and it will copy the texture to the problematic part;
Thus saving a lot of time and effort.

Ok I have gone far enough ahead to see what would happen if I was to reintroduce this map to my face in max, I have been waiting to see what would happen so here goes; I turn the guide off and I saved the image as a psd. Then I created a new material in max and opened my psd file as a diffuse bitmap, and select collapse layers then I drag it on my model.
As you can see it seems to have a few problem areas like the ear that I was unable to model in the time provided I will go back to Photoshop and make the ear a little bit higher and do some corrections. Also in photoshop I will create an action to streamline the update in max, and so I do not have a worry about which layers are visible in max and which layers aren’t in max.
Now Photoshop is looking to see what we want to do next all I will do is turn off the guide layer and the save and then stop the record on the new action. Now when I update the image in Photoshop all I have to do is click on my action and run it, and then Photoshop will hide my guide layer and save the image and max will only see the layers I want it to see. Very handy tool.

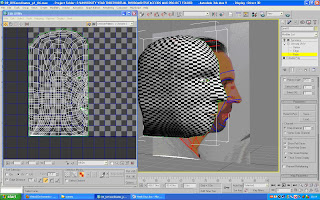
Ok I think I am finished this part to the best of my abilities and here are the images of the texture both in Photoshop and 3ds max.

Week Four

Ok in this part I am going to try to apply a UVW map to my head so the texture goes on with no problems whatsoever. So with my head selected I make sure I have the edit poly bit selected but am not in sub object mode, and I am under the symmetry and then I apply the UVW unwrap modifier.
Next I switch to the left view port and paint all the faces in sub object mode of the UVW unwrap modifier, I am selecting the faces I want to be manipulated by the modifier.
Then with the selected faces I go down the modifier panel to the map parameters and click on the cylindrical option, and then I had to align to the y axis to correct the position of it and scale the cylinder to fit around my head.
In the top view port move the cylinder so the middle lines up with the seam of the head.
Next job was to create a checker pattern to add to the model, this is where my tutor Eric jumped ahead leaving me unsure as how to create the chequered map until I looked at the others in my group to see how they had done theirs, Steve Muller seemed to show an example so I used his options to create mine.
The next part is to select the modifier go to faces mode and then click the edit button in the modifier parameters page. This opens the edit UVWs map so I can see my face all laid out flat. The first thing we do is to see if the texture coordinates have come in correctly so de select everything I click on tools and then select inverted faces this option this shows that most of my faces are inverted so then I click and drag over all the faces and click on the mirror option at the top, and position this in the left part of the screen.
There are a couple of nifty tools that I can use to help me get the texture map right on the select panel they are ‘select inverted faces’ and ‘select overlapped faces’ both these options instantly show us in red where problem areas are. By selecting inverted edges and checking our map we can see the places that we need to edit.
Now if I zoom to one of the ‘red’ areas or problem areas and select all the vertices that are problematic then go to the tools panel and select relax, this tool helps me sort the vertices out somewhat, further tweaking is still needed however.
Then if I click the relax apply option the affected areas relax;
And once more;
These tools help me create the whole map of the face with no inverted faces and no overlapping faces, it was time consuming however as I had a few problematic areas to begin with. So if I have a look in the view port there are some areas with a bit of stretching but on the whole for the most part the pattern is very uniform and this is what we were hoping for.
Ok the next part I get out of edit area, back out of sub object mode the click on the symmetry modifier and that is where I want to be, but not in the symmetry modifier.
Then I apply another UVW unwrap modifier so I can edit the other side of the symety as well.
Back in the edit mode for the modifier and we can see my texture mapping, then I select face mode and click the select by element option and click on the map until I have the symmetry side selected and then I click on mirror, and then move it over to its correct side. Matching up the seam right down the middle.
Now I weld the seam’s vertices together by selecting each vertex on either seam and (ctrl+w) welding them together
Now the whole map has been welded I am ready to proceed, under the options panel in the “use custom Bitmap size” I have used the width 512 and the Height 256. then select the lot and using the transform tool make sure the map is within the box, leaving a small buffer around the edges.
Finally I want to turn this into an image so I can use it in Photoshop and use it as a guide, to do this I go to tools and then click the render UVW Template option, then I specify a resolution in the following widow, I used 512 and 256 last time so this time I will be using 2048 and 1024. Then I uncheck the Seam Edges box and render the template.
This concludes this weeks work join me for the final post where I attempt to make and paste my texture to the model.
Ok to start this week off, I made the topology of the side of my head but there are a few issues that I have considered. first of all to get the basic shape of my head I do the topology however I have created a mesh for my face and in it, the amount of faces is considerable, therefore my topology is not going to match the mesh, therefore creating my head is going to be a considerable effort; every sphere vertices must match my face and it’s vertices
I start by modelling the head, I used a sphere to do this to get the basic spherical shape of my head, I rotated the sphere and positioned like so.
The next step was to scale the sphere into an oval shape to fit the face that I had already created and to reposition it again.
The next step is to modify the sphere’s segments to match the edges on the forehead, so when I come to welding the vertices on the sphere and the mesh the number of edges match. A bit confusing but maybe the next image shows what I mean.
The next step is to paint a selection of faces (in the left view port) that I wish to delete this will leave me just the shape I want; I am making sure I delete the horrible triangles around the spheres axis.
This next picture shows the shape left after the horrible faces are deleted, it also shows (in red) the 30+ problem areas (faces) that I have just noticed I am going to have to sort out to (later on) when I attach the sphere (head) to the mesh (face). Oh dear!
Ok continuing on, I am going to start like I did on the face select the various vertices and move them to their correct position on my head. I will be using the front and left viewports and reference pictures to do this. I will start right at the top and select the first vertices and pull it over to the one opposite on the face.
I have frozen the face mesh and made it see through, this helps me just select the sphere and line it up easier.
The next image shows me advance quite a bit but seeing how I’ve had to put up with Eric my wonderful tutor doing it I suppose that’s ok. I have matched the basic shape of my head, and I am now concentrating and trying to match them vertices that I thought would be a problem area and indeed they are.
If you were wondering my technique for creating new faces well it was all very easy I selected and edge and clicked the ring or the loop tool thus selecting all the edges in that line and then shift moved them to create a new edge(s) then lined up the new vertices to the existing one on the face and carried on.

Ok I have had some problems because my mesh has so many faces my sphere is getting really messy now and I am trying to create all the vertices on the sphere that I need and I have had to work on this mathematically and try and create a patchwork to sort it out. I have sorted it out but It may cause some problems later.
This next image shows me in front view port matching the vertices up but there are so many and I am getting despondent, it is taking forever to do this, and I am not getting the shape I want. I will continue but I am unsure that it will work.
To let you see what I am doing I will post a few more images, I am trying to sort out which vertices goes where in relation to the curve of my face.
Maybe I am doing this wrong but I have no clue, it seems Eric Mclowsky or what ever his name he failed to show us this bit so I am persevering further into the unknown, but using his video as a guide. I am also considering trying to find another tutorial on this.
It doesn’t look right but I am nearly finished it, I don’t have shoulders or a neck and this last part has really confused me. I think I will try to just concentrate on the head the neck can wait, this part has really taken too much time to do and I have loads left to do. Five weeks seems too short to do this.

Ok this next image shows what I have done, I have finished the front and the side but now I have to move the faces that just don’t look right and maybe soft select some vertices to pump out the head.

Ok I have fast forwarded in time and welded the face and the heads vertices together then I have attached the two objects together as well this leaves me one object to manipulate and it helps with the symmetry of both parts.
Ok now I am concentrating on the nose and the lips, to add some details to the face, the lips edges were selected and shift moved to create new ones to manipulate further and with a little tweaking I have created some good lips, and the nose area has been given some attention as it was a bit big and the nostrils didn’t exist.


Ok lastly I have created some eyes this was done by using a sphere and a cylinder, positioning them in place and modifying the sphere to fit the cylinder. This created a lens shape for my eye.
I have cloned the sphere and squashed it to create a plate shape this will represent the white of my eye.
Then I have positioned them like so:
And with a bit of tweaking produced the final result, this concludes this part.